|
Portable
|
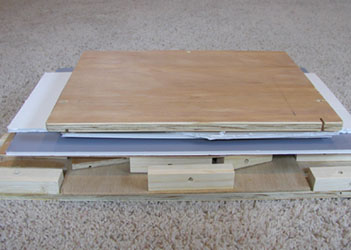
Fig 1: Packs flat to 19" x 14" x 5" |
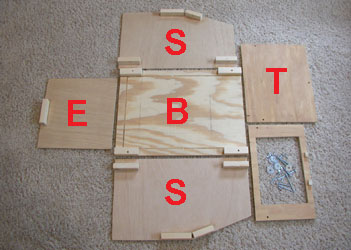
Fig 2: Components can be stacked together |
| |
|
As can be seen in Fig 1 and 2, the camera box consists of a handful of
components which can be stacked flat, one on top of another. The final
package is roughly 5 inches thick and approximately seven pounds, able
to be packed in an airline carry on. A major priority is that the
entire camera setup be portable such that able to travel to take
pictures of various collections.
|
Dimensions of the box:
| B = Bottom | 19" long, 14" wide. Made from 1/2" plywood |
| S = Sides | 19" long, 12" tall at the end, 9" tall
at the front. The angle starts 11" from the end. Maybe 3/16" thick
paneling |
| E = End | 12" wide, 12" tall. 3/16" thick paneling |
| T = Top | 14" wide, 11" deep. 1/2" plywood |
|
| |
|
Easy to assemble/disassemble
|
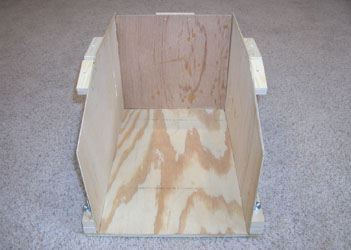
Fig 3: Shell goes together with four bolts |
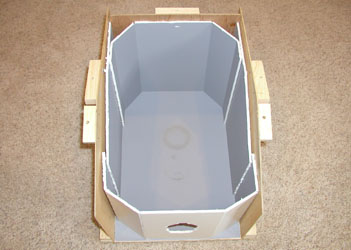
Fig 4: Grey foam board sets inside shell |
| |
|
The top(s) and bottom of the camera box are made out of 3/8" plywood,
with the sides and back consisting of lightweight panneling. The sides
attach to the bottom with four bolts/wing nuts, and the tops
attach to the sides with five bolts/wing nuts. The pine blocks
glued and stapled to the sides/tops/bottoms when bolted together make
for a very sturdy but still portable and lightweight box.
|
| |
|
The inside of the box is fully lined with grey foam board, including a
rectangular section over the top (not shown in Fig 4). The back and front
are scored and angled, providing for an almost complete surround of a
given beer can. This provides for just enough light bounce as well as
reasonable background to the images. Note the foam board pieces are
simply set inside the box, not glued, allowing for easy replacement as
well as stacking flat.
|
| |
|
Functional
|
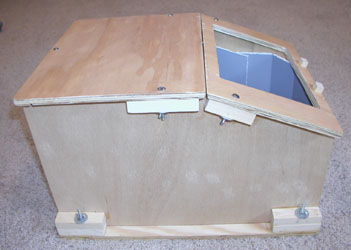
Fig 5: Flat top, sloped light source |
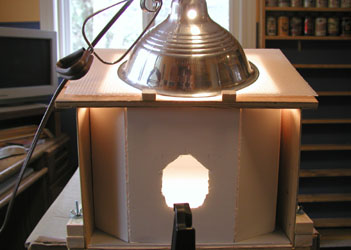
Fig 6: Finished product (minus the camera on tripod) |
| |
|
As can be seen in Fig 5, the camera box has a solid flat section,
useful for setting light source and/or cans when switching or
rotating beer cans. The sloped section has a large rectangular opening,
allowing for easy access to placing or rotating a beer can, without
need to move the camera or foam front "shield". This rectangular
opening is covered with a thin piece of flourescent light cover, and
the light source is set on top of this cover.
|
| |
|
The finished product has a standard utility light with 60 watt soft
white bulb. Camera is mounted vertically on a tripod leveled to the
camera box. Note that the opening of the front foam shield is larger
than the camera lens, allowing raising and lowering of the camera
depending on size of the can (e.g. 8 oz cans lower, 16 oz cans higher).
Not shown in the pictures is an additional piece of foam board with
circle cut to the size of the camera lens. This extra piece sets around
the camera lens, and the end of the lens set just to the edge of the
front foam shield.
|